
In preparation for my FMP, I watched two tutorials about lighting because I would like to include low-key lighting in my film to add depth and emotion to my shots.
Tutorial #1: FilmRiot- Basic Lighting Techniques.
In this video, I was taught lighting terminology and methods of lighting a scene.
Low Key lighting- Low key is a more contrasting look. It uses shadows to create a tone and atmosphere. Using Low Key lighting can add emotion to your cinematography.
High Key Lighting- High key lighting gives a shot a more flat, and less contrasting look. Cinematography like this is seen mostly in comedies and romance films. They don’t add any tone or emotion to the shot.
Key Light- The key light is your main light.
Fill Light- The fill light is to control the shadows and contrast in the shot.
Back Light- The back light is to add depth to your shot.
The methods include:
Broad side/ Near side–
Broad side lighting is when the light hits the broad side of the face, with the face at an angle, it will be on the side that faces near the camera.
Short side, is when you have the light on the short side of the face, if the actors face is at an an angle, this would mean the side of the face that is further away from the camera. This method adds more contrast and depth than Broad side lighting.

Side light–
It is when you place the light at the side of the subjects face, it is a good way to create a dramatic image.

Rembrandt Lighting-
This name comes form a famous Dutch painter that was one of the first pioneers in low-key lighting work. You can tell that you have used Rembrandt lighting because a triangle of light appears under the eye which is further away from the camera.


Backlight-
This can help to create depth or drama, it can make a scene seem scary or mysterious. I would like to experiment with backlighting in my FMP because i think it is a good way to make a mysterious atmosphere with lighting.
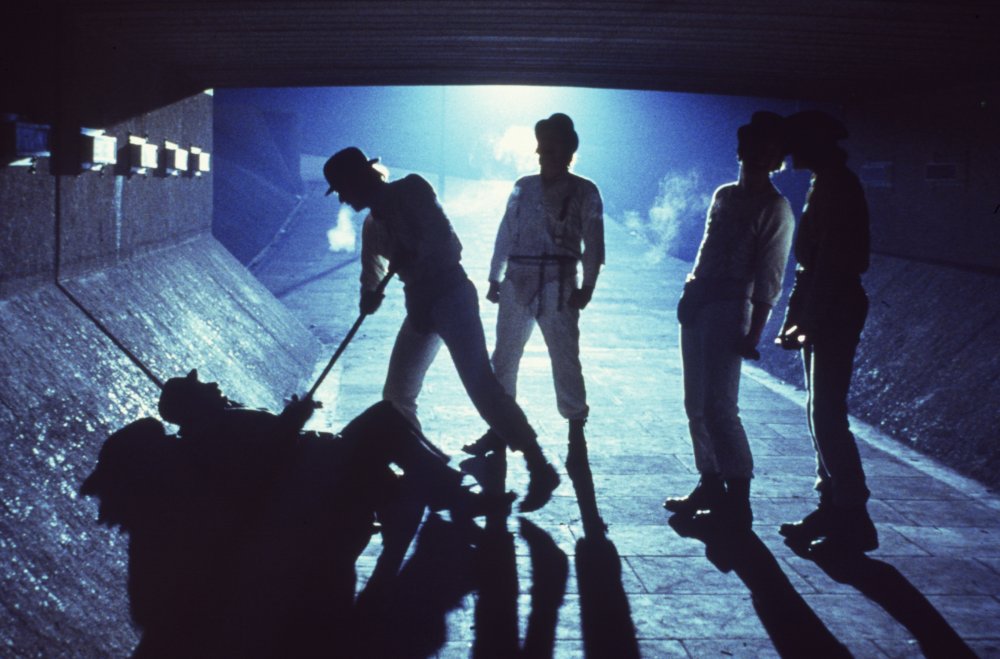
Rim Light-
If you move the backlight around the subject slightly, it gives you a rim light. A rim light adds more definition than a backlight and is not completely silhouetted.

Tutorial #02: FilmRiot- Great Cinematography with one light.
This video shows some of the different lighting methods you can use in one shot/scene. The video shows an example of an interrigation scene and you can see the different emotions and tones the lighting can evoke in the audience.
The you tuber uses a generic filmmaking light with some black paper around the light to act as barn doors and make the light softer around the edges.
Initial bounce lighting-
This lighting set up is one light, facing directly onto a wooden table and the light we see on the subjects face, is bouncing from the wooden table. So the light we get on the subject is softer than if the beam was facing directly onto the subject. So in this situation, you get two light sources from one key light.

Black table cloth-
If you throw a black table cloth onto the table, the most of the light will be absorbed because black material absorbs light and heat. Very little of the light is being reflected because it is white that reflects light. Using the black cloth gives the shot a very dark and ominous tone.

White table cloth-
The white sheet reflects a lot of light onto the subjects face, making the shot a lot lighter and changing the mood of the shot. It makes it seem like you have placed another light source under the subject, when it is still just a bounce.

The dark and mysterious look-
If you want your scene to be dark and ominous, adjust your light and barn doors so the light is only hitting the table and not the actor, then place the black cloth down. By doing this, the actor will be bearly visable and make for a really mysterious shot.

Example of extreme directional bottom lighting-
I think that extreme directional bottom lighting like this looks unprofessional and it does not look very cinematic. I will not be using this example of lighting in my film. I much prefer soft bottom lighting.

Watching these tutorials have been extremely helpful in for my FMP. It has shown me multiple Low-Key lighting methods that I would like to use in my film. For example, I think that the second tutorial of using one single light and a table is a very resourceful and creative use of lighting.
In the first tutorial, it showed me how I can use Backlighting in my film. Which is a technique that I am interested in using in my FMP.

